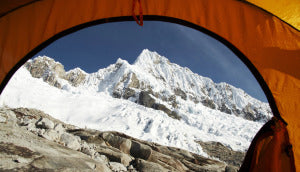
Food and shelter are basic needs, in or out of the mountains. Lightweight backpacking tents are reliable protection and keep you warm and dry despite Mother Nature’s best shots in the high country. Wind, rain, and assorted bugs and creatures that buzz and go bump in the night can be kept at bay, and with neighbors it’s nice to have a little privacy.
Some of the newer designs have snazzy features like clear windows to peer out from, and big vestibules to increase your living space and give a spot for foul weather cooking. Other innovations are taped seams for hassle-free waterproofness, and nylon zipper pulls instead of metal so on windy nights there isn’t any jingling to jangle your nerves.
Pick a day and set yours up before heading out on a camping trip. If the tent is new (or new to you) it’s better to figure it out now, not when you are “in the dark” or frantically trying to beat an approaching thunderstorm.
CARE AND REPAIR
If the tent is used, check for missing parts. Count your tent stakes and see if the pull outs all have loops. If some need replacing, consider using reflective cord so you can find your tent with a flashlight. Look at the pole sections and check for burrs on the connecting pieces that could snag fabric. To keep zippers running smoothly, spray the slider with silicone and try to keep the coils or teeth out of sand. Tears in the fly can be patched with self-adhesive, rip-stop tape.
Normally, you can just use water with mild soap to sponge off dirt and crud. If your tent looks like it was used in a mud wrestling contest, hose it down or put it in your tub, but never use a washing machine or dryer.
How’s the floor? If the shiny coating is peeled up, use rubbing alcohol and a rag to scrub that area. Once it is dry, use K-Kote Recoat to repair small sections. If the seams on the floor haven’t been treated, use Seam Sealer. Otherwise, needle holes from the sewing machine will leak. Do this with great ventilation because the fumes can be nasty. Small holes or tears in the floor can be easily repaired using Seam Grip.
If your tent smells funky and there are brown stains on the fabric that look like mud spots or little crosses, but won’t wash off, it’s mildew from storing the tent wet. Without treatment, it will continue to grow and weaken the fabric. A home remedy to kill mildew is to sponge the affected area with 1/2 cup of Lysol in a gallon of cold water, then let it dry.
For mildew in the floor, use a gallon of hot water with 1/2 cup salt, and 1 cup concentrated lemon juice and let it dry. This will help the coating peel off so you can paint on a new one (K-Kote Recoat).
A simple tent repair kit of duct tape, extra cordage, rip-stop tape, needle and thread, and a metal tube to splint broken poles is good to have just in case.
In camp, find a level spot for your tent that doesn’t have dead trees or branches looming. Groom the site for sharp rocks, pine cones, porcupines, and such. A ground cloth or “footprint” works well in protecting the floor from sap, dirt, and punctures; just be sure it doesn’t stick out from the sides or it will collect rain.
SETTING UP YOUR TENT
UV rays from the sun makes nylon brittle and weak over time. Pitch your tent in shade if available and leave the rain fly on. It is more durable than the canopy and is cheaper to replace.
To avoid damage, don’t snap the pole sections together when assembling them, and be sure the connections don’t have gaps before flexing the pole. When breaking down, push rather than pull the poles out of their sleeves so they don’t come apart and snag fabric.
Unless it’s not yours, watching a free-standing tent roll away is no fun. Stake it securely in case the wind picks up and so the rain fly doesn’t sag onto the body of the tent. To protect the relatively fragile tent floor, keep Fido out, take your boots off, and be careful with insect repellents containing DEET.


